

Kitchen Cabinet Installation Basics
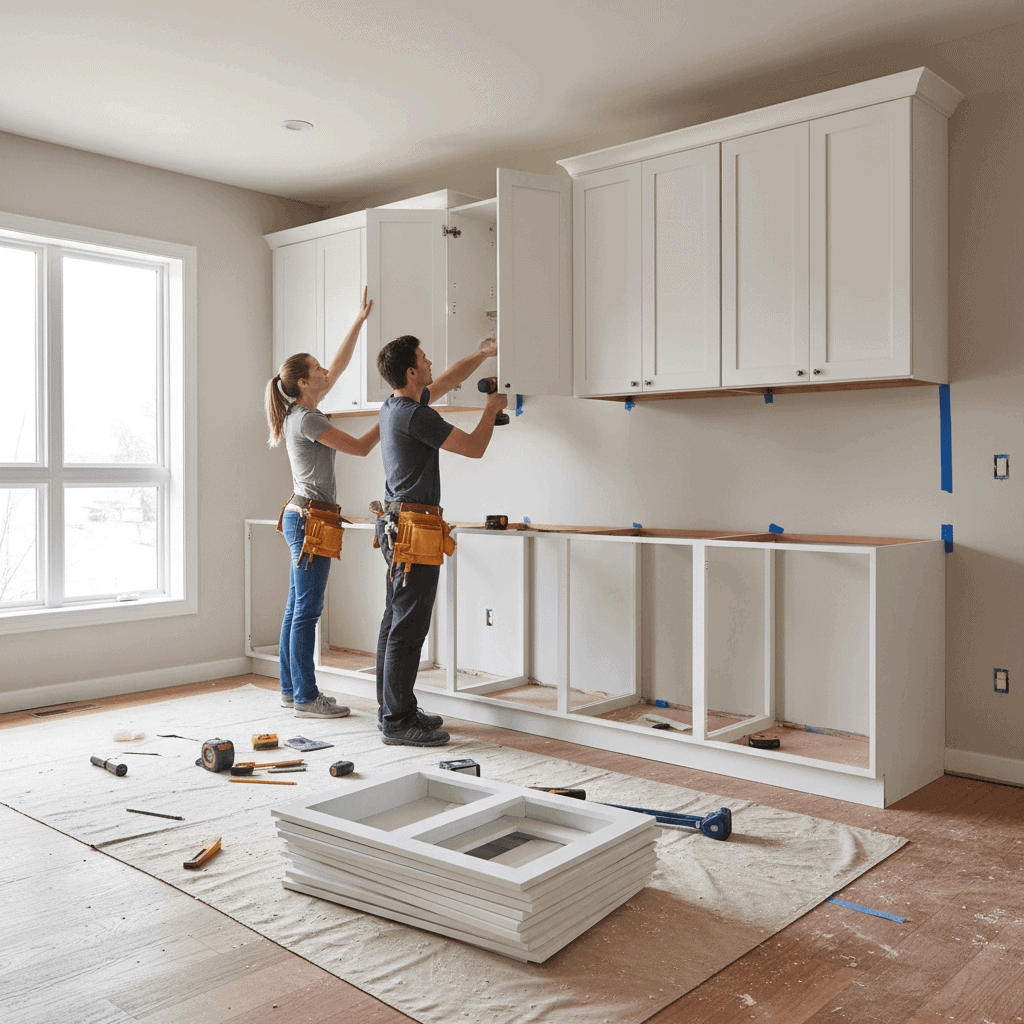
Kitchen cabinet installation begins with a solid plan and careful work. Homeowners tackling a weekend job or someone new to renovation managing a contractor will find knowing the steps and usual mistakes helps get cabinets that stay level, look great, and last a long time. Learning these tricks can save frustration and keep the kitchen looking sharp for years to come. Keep reading to uncover practical tips that make the whole process smoother and more rewarding.
This article breaks down essential steps from measuring to final adjustments. You will find practical tips on materials, tools, time estimates, and troubleshooting so you can make informed choices and avoid common mistakes.
Planning and measuring for kitchen cabinet installation basics
Good planning reduces wasted time and surprise expenses. Begin with a simple plan that records wall lengths, window and door locations, and the positions of plumbing and electrical fixtures. Measure wall height at several points. Walls are rarely perfectly straight or flat, so multiple measurements help you spot any irregularities.
- Measure twice then cut once. Record measurements on a single sketch so nothing gets lost.
- Note the location of studs. A stud finder speeds up the process and tells you where to screw cabinets so they hold weight.
- Account for appliances. Leave clearance for refrigerators, ranges, and dishwashers including ventilation and door swing.
Tip example. If a refrigerator requires an extra inch for airflow or a stove needs a wider niche, include that in cabinet layout before ordering. Small oversights lead to big adjustments later.
Choosing cabinet styles and materials for kitchen cabinet installation basics
Cabinets vary by construction, materials, and finish. Common box materials include plywood, particle board, and medium density fiberboard. Face frames and doors are often made from solid wood, veneer, or engineered materials. Each choice affects price, durability, and repair options.
- Plywood boxes resist warping and hold fasteners well. They are a good mid to high range choice for longevity.
- MDF doors offer smooth painted surfaces and a consistent look. They are heavier than hollow core doors.
- Solid wood doors provide a natural look and can be sanded and refinished when needed.
Finish matters for daily use. Matte finishes hide fingerprints better. Semi gloss or satin finishes are easier to wipe clean after cooking spills. Hardware choice affects usability. Soft close hinges reduce slamming while full extension drawer slides improve access to pots and pans.
Pre installation preparation and site readiness
Before any cabinet gets moved into place, create a stable, clean workspace. Remove old cabinets, patch walls, and verify that utility lines are ready. Take time here. A clean start reduces the chance of rework once cabinets are on the wall.
Checking for level and plumb
Use a long level and a straight board to check walls and floors. If walls bow or floors slope, you will use shims to bring cabinets back to level. Mark high and low spots so you know where to add material during installation.
Securing utilities
Confirm the locations of water supply, drain lines, gas lines, and electrical outlets. If a sink or range will move, arrange plumbing and gas adjustments before cabinets go in. This prevents ripping out finished cabinets to correct utility placement.
Step by step installation process for kitchen cabinet installation basics
The sequence matters. Following a logical order keeps the project efficient and makes later tasks easier. Below is a standard approach that most professionals and well prepared DIYers follow.
- Dry layout first. Place each cabinet in position without fastening so you can check spacing and clearances.
- Install upper cabinets before base cabinets. Hanging upper units while you have access to the wall is safer and more convenient.
- Secure a ledger board to mark the bottom line for upper cabinets. This temporary support holds weight and helps keep units level while they are fastened together.
- Find studs and fasten through the cabinet back into studs for a dependable hold. Use long screws designed for cabinet installation.
- Shim as needed at the top and bottom to make cabinets plumb and aligned with neighboring units. Once two cabinets are level and flush, clamp and screw them to each other through the face frame or rail using screws that will pull them tight.
- Install base cabinets after uppers. Set a level line on the wall for the top of the bases. Use shims under the cabinet to deal with floor irregularities.
- Countertop prep comes after base cabinets are secured. Verify measurements for countertops and any cutouts for sinks or cooktops before ordering.
Fastening and alignment tips
Face frame cabinets allow screws through the frame. Frameless cabinets require fastening through the cabinet sides. Pre drilling pilot holes reduces splitting. Always check alignment with a long level and an adjacent cabinet. Minor misalignments are usually corrected with shims and sanding of filler pieces.
Common challenges and troubleshooting for kitchen cabinet installation basics
Unlevel floors and out of plumb walls are among top challenges. Here are practical fixes used on site.
- Gap at base due to a sloped floor. Use shims to lift the low side and cut a toe kick to match the new plane.
- Misaligned doors after installation. Adjust hinges to change the door position within the frame and to set even reveals.
- No stud where needed for a heavy cabinet. Use a toggler anchor designed for cabinet loads or add a horizontal ledger that ties into adjacent studs.
- Short clearances for plumbing. Install island plumbing or use a flexible hose extension to gain a few extra inches.
Example. If an upper cabinet sits slightly forward compared with its neighbor, loosen the screws that join the two units, push them into alignment, and re fasten with clamps in place.
Cost factors and time estimates for kitchen cabinet installation basics
Costs vary with material choice, cabinet size, and labor rates. Here are ballpark figures to set expectations. Ready to assemble or stock cabinets cost far less than higher quality plywood boxes with solid wood doors. Labor for installation is often charged by the hour or as a flat job rate.
- Material ranges from entry level stock to higher quality semi custom. Expect a wide band in price depending on selected options.
- Labor time for a typical mid sized kitchen runs from two to four days for an experienced team. Complex layouts and site corrections add days.
- Hidden costs include countertop fittings, plumbing moves, and hardware upgrades. Allow a contingency of around ten percent for unexpected items.
If you prefer a local installer to handle measurement and installation in Orlando then Click here for more information on services available. A direct site visit produces a reliable estimate based on existing conditions.
Maintenance and care after kitchen cabinet installation basics
After installation, regular maintenance keeps cabinets functioning and looking good. Clean spills promptly. Use mild soap and water for painted or sealed surfaces. Avoid abrasive cleaners that can remove finish and accelerate wear.
- Periodic checks on hinges and drawer slides help catch loose screws before they cause alignment issues.
- Refinishing small scuffs on solid wood doors with matching stain extends life and keeps cabinets consistent in appearance.
- Humidity control helps wooden components. Maintain indoor humidity in a moderate range to prevent swelling or shrinking.
Small adjustments such as tightening a loose hinge or adding a bump stop behind a drawer can extend the functional life by years and maintain cabinet performance.
Finishing touches and hardware selection for kitchen cabinet installation basics
Hardware affects both appearance and usability. Pulls and knobs come in sizes and styles that change how you interact with drawers and doors. Choose hardware that fits your hand and provides comfortable grip. Consider finish durability in areas near the sink where oils or water happen frequently.
Lighting under cabinets improves visibility on the countertop. LED strips are common because they are thin, energy friendly, and produce little heat. Plan wiring before installing uppers so channels and power packs are hidden.
Conclusion
Kitchen Cabinet Installation Basics combine good measurement, the right materials, a logical installation order, and small adjustments that lead to big results. Measure walls and openings carefully. Choose materials that match your use and budget. Prepare the site to avoid surprises. Follow a standard sequence for installing uppers then bases, use shims to correct uneven conditions, and fasten into studs when possible. Watch for common issues and address them early. Regular maintenance keeps the installation working well for years.
If you are ready to get started gather your measurements, pick a layout, and decide whether you will do the work yourself or hire a professional. A clear plan and an accurate estimate will save time and money. For more hands on support or a local quote take the next step and arrange a site visit with a trusted installer. A proper installation protects your investment and gives you a usable kitchen that fits daily life. Call or request a visit today to move from planning to finished cabinets.


